

Yes, it just wouldn't be Christmas without my yearly mishap, in which I hurt myself in one manner or another. This year I scored a double dip. Last week, as I was bringing in decorations from the guest house, I missed the first step on the back porch stoop and landed hard on the steps, on my poor thigh, which sent me to the ER for x-rays to make sure I didn't have a hairline fracture. Yes, it hurt that badly. However, I did save the decorations, which were still in tact. Hmmm... Ornaments: Cheap - Visit to the ER: Not Cheap. So, it was probably a bad split-second decision on my part


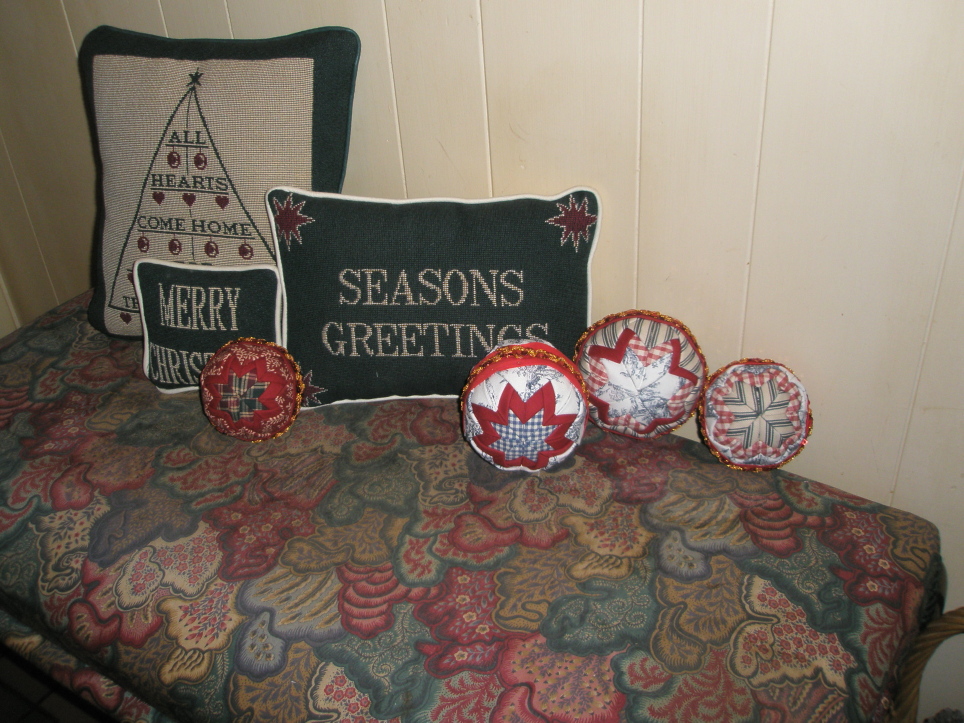
The Supplies:
3" or 6" round styrofoam balls
gazillions of straight pins
3 different prints in fabric (or dozens of different ones if you plan to make many)

some pretty trim, lace, rickrack or ribbon (or whatever you like to finish it with)
your imagination
Directions:
1. You begin by cutting 3" x 3" squares of the fabric. You'll need eight squares for the starting group and sixteen 3" x 3" (of each of the other two fabrics for the rest of the project. For me, this was the most tedious part of the process. Once you have the squares cut, it's a breeze.

3. When you place the first pin, be sure that the piece is folded in half. Once you've inserted the pin, carefully fold down the upper left corner and secure with a pin. Repeat with folding done the right side the right side.
4. Now you can also insert a pin into each outside corner.
5. Exactly opposite of the first fold, you can start the 2nd fold, making sure to keep straight with the opposite fold.
6. Do the other 2 sides in the same way. Now you can begin the next fabric folds, starting in the same way.
7. I started about an inch from the center of the first set of folds, keeping with the straight fold lines, adding a total of 8 folds for the second row, thus making an 8 point star.
 8. The next row I started about 1/2" down from the previous row of folds and added an additional 8 pieces (folds).
9. This where I tell you to just go watch the video. It's far better than my explanation. Seriously.


8 comments:
You are just too darn creative!! I love it! One day I am going to get into stitching! I should probably learn to sew a button on first though.
I would check out that popping rib thing...unless it goes away. Might have just been a weird muscle/tendon ping thing. Makes me cringe either way! Glad your hip bone (connected to your thigh bone) is in tact!
Ouch! Hope the 'pop' wasn't a rib!! But I am glad to hear that I'm not the only one that is accident prone:)
Thanks for the tutorial! Maybe I can do this next week when my daughters are all here to play.
You have to watch yourself girl, we are not as young and flexible as we once were. But, we are so much wiser, right?!
You are much more talented than I young one. I'll admire your work from afar.
Ouch! And, anything with a glue gun makes my eyes glaze over;)
Love the idea! Looks so like origami I love it. Me too, with the glue gun obsession. Great for keeping the old fingers limber too...:)Thanks for finding and reporting this project.
Gosh, glad you're not laid up in bed and you survived! The ornaments are cute but I'm not crafty. Thanks for sharing :)
Love This!
Post a Comment